How to Use an Air Compressor: A Step-by-Step Guide for Beginners
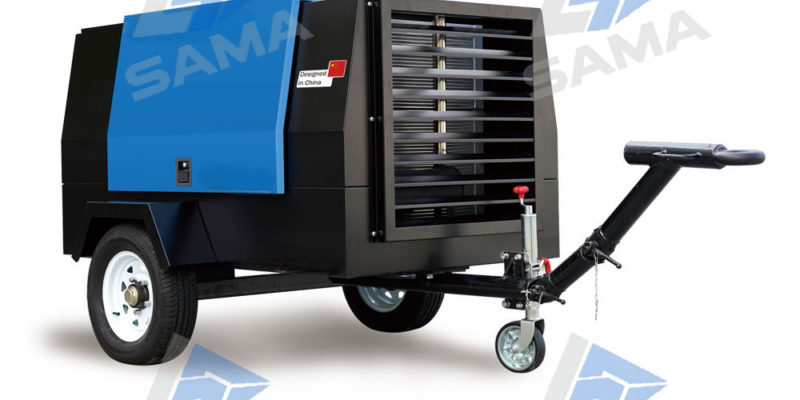
An air compressor is one of the most versatile tools in any workshop, garage, or construction site. From inflating tires and powering nail guns to running impact wrenches and spray guns, air compressors make tough jobs easier and faster.
If you are new to using an air compressor, this guide will walk you through everything you need to know – from setup and operation to maintenance and safety.
Step 1: Understand Your Air Compressor Type
Before you start, it helps to know what kind of air compressor you are using. The two most common types are:
Electric Motor Air Compressors
These air compressors are powered by an electric motor connected to a standard wall outlet (110V) or a higher-voltage circuit (220V–240V). They are the most common choice for home workshops, garages, and small businesses because they are quiet, clean, and easy to operate.
DC Motor Air Compressors
A DC motor air compressor runs on 12V or 24V direct current, typically from a vehicle battery. These compact air compressors are designed for mobile use – inflating truck tires, running small air tools on a service call, or providing emergency roadside air.
Note: A DC motor air compressor cannot run large tools like impact wrenches or sanders for extended periods. For that, you need a larger electric motor-driven unit.
Step 2: Gather Your Supplies
Before operating your air compressor, make sure you have:
- Properly rated air hose (1/4” or 3/8” depending on your tool)
- Correct fittings and couplers for your tools
- Air tool oil (for pneumatic tools that require lubrication)
- Safety glasses and hearing protection
- Owner’s manual for your specific air compressor
If you have an electric motor air compressor, verify that your outlet matches the unit’s voltage and amperage requirements. Many larger air compressors require a dedicated 220V–240V circuit.
If you are using a DC motor air compressor, ensure your vehicle battery is fully charged and the engine is running to avoid draining the battery.
Step 3: Prepare the Air Compressor for Use
Follow this checklist before starting any air compressor:
For Electric Motor Air Compressors:
- Place the unit on a level surface – This ensures proper oil lubrication (for oil-lubricated models).
- Check the oil level – If your air compressor requires oil, add the recommended type. Many small air compressors are oil-free; check your manual.
- Inspect the air filter – A clean filter prevents debris from entering the pump.
- Connect the air hose – Attach one end of the hose to the air compressor’s outlet. Use Teflon tape on threaded fittings to prevent leaks.
- Plug in the electric motor power cord – Use a heavy-gauge extension cord if needed (minimum 12 gauge for longer runs).
- Open the drain valve – Open the valve underneath the tank to let any condensation escape. Close it before starting.
For DC Motor Air Compressors:
- Connect the clamps – Attach the red clamp to the positive (+) battery terminal and the black clamp to the negative (-) terminal or a clean ground.
- Start the vehicle engine – This prevents draining the battery while the DC motor runs.
- Attach the air hose – Use the included hose or connect your own.
- Set the desired pressure – Many DC motor units have an integrated gauge and regulator.
Step 4: Start the Air Compressor
Starting an Electric Motor Air Compressor
- Turn the pressure regulator to zero – This prevents sudden pressure when the unit starts.
- Close the drain valve if you opened it earlier.
- Flip the power switch to the ON position – The electric motor will start, and the tank will begin filling.
- Watch the tank pressure gauge – Most air compressors will fill to between 100–175 PSI, then the electric motor will shut off automatically.
Starting a DC Motor Air Compressor
- Turn the on/off switch to ON – The DC motor will start running.
- Monitor the pressure gauge – Most DC motor units do not have large tanks; they may run continuously while you use air.
- Use air in short bursts – To avoid overheating the DC motor, follow the manufacturer’s duty cycle (e.g., 15 minutes on, 15 minutes off).
Safety note: Never leave a running air compressor unattended, especially DC motor units which can overheat if run too long.
Step 5: Set the Correct Pressure for Your Tool
Different tools require different pressures. Most pneumatic tools operate at 70–100 PSI. A typical air compressor with an electric motor delivers much higher pressure (125–175 PSI), so you must reduce it.
How to adjust pressure:
- Pull up on the pressure regulator knob to unlock it.
- Turn the knob clockwise to increase pressure, counterclockwise to decrease.
- Watch the outlet pressure gauge (often labeled “regulated pressure”).
- Push the knob down to lock your setting.
| Tool Type | Typical Pressure (PSI) |
| Nail gun / stapler | 70–100 |
| Impact wrench | 90–100 |
| Spray gun | 30–50 |
| Tire inflator | 30–40 (car), 60–80 (truck) |
| Blow gun | 30–60 |
For DC motor air compressors: Many have a fixed pressure output (e.g., 100 PSI). If you need lower pressure, use an inline regulator on the hose.
Step 6: Connect and Use Your Air Tool
- Attach the air hose to the tool – Use a quick-connect coupler. Pull back the collar, insert the fitting, and release.
- Test the tool – If it seems underpowered, increase the regulator pressure slightly. If it runs too fast or rough, decrease pressure.
- Use the tool as intended – Follow the tool manufacturer’s instructions.
Important: For tools that require lubrication, add a few drops of air tool oil into the air inlet before each use. This is especially important for impact wrenches, grinders, and sanders.
Step 7: Shut Down the Air Compressor Properly
Proper shutdown extends the life of your air compressor, whether it uses an electric motor or a DC motor.
For Electric Motor Air Compressors:
- Turn off the power switch – This stops the electric motor.
- Unplug the unit – Remove the power cord from the outlet.
- Open the drain valve – Release any remaining air pressure and let condensation drain out.
- Coil the air hose – Store it properly away from heat and sharp edges.
- Wipe down the unit – Remove dust, debris, and moisture.
For DC Motor Air Compressors:
- Turn off the switch – Stop the DC motor.
- Disconnect the clamps – Remove from the battery terminals.
- Release remaining pressure – Open the drain or pull the relief valve.
- Allow the DC motor to cool – Stow the unit only after it is cool to the touch.
Safety Tips for Using Any Air Compressor
- Always wear safety glasses – Compressed air can blow debris into your eyes.
- Never point an air nozzle at yourself or others – Compressed air can enter the bloodstream if it breaks the skin.
- Do not use compressed air to clean clothing or skin – This can force debris under the skin.
- Inspect hoses for wear – Replace cracked or leaking hoses immediately.
- Do not exceed tool pressure ratings – Overpressurizing a tool can cause it to burst.
- Secure the air compressor on a level surface – Prevent tipping, especially for DC motor units placed on vehicle floors.
- Routine Maintenance for Long Life
For Electric Motor Air Compressors:
Daily: Drain condensation from tank.
Weekly: Check oil level (if oil-lubricated); clean air filter.
Monthly: Inspect hoses and fittings; test safety relief valve.
Annually: Change pump oil (per manual); replace air filter element.
For DC Motor Air Compressors:
After each use: Wipe clean; drain any moisture.
Monthly: Check clamps and cables for wear; inspect hose for cracks.
As needed: Replace worn quick-connect fittings.
Pro tip: For electric motor units, if the air compressor cycles more frequently than usual, check for air leaks in the hose or fittings.
Troubleshooting Common Problems
| Problem | Likely Cause | Solution |
| Air compressor won’t start (electric motor) | No power, tripped breaker, faulty switch | Check outlet, reset breaker, test switch |
| DC motor won’t run | Low battery, poor ground connection | Charge battery, clean clamps and terminals |
| Low pressure at tool | Regulator set too low, air leak, undersized hose | Increase pressure, fix leaks, use larger diameter hose |
| Air compressor runs continuously (electric motor) | Air leak, worn pump, unloader valve stuck | Find and repair leak; service pump |
| DC motor overheats | Exceeded duty cycle | Allow to cool; use shorter run times |
| Water in air lines | Tank not drained, humid conditions | Drain tank more often; install inline dryer |
Final Thoughts
Using an air compressor is straightforward once you understand the basics. Whether you are operating a large electric motor unit in a workshop or a portable DC motor air compressor on a service truck, the same principles apply: prepare properly, set the correct pressure, use the right tools, and maintain your equipment.
Recap of key steps for using any air compressor:
- Choose the right air compressor for your job (electric or DC motor)
- Set up on a level surface and check fluids
- Connect the hose and required fittings
- Start the unit and set the correct pressure
- Use your pneumatic tools safely
- Shut down and drain condensation after every use
- Perform regular maintenance
Now that you know how to use an air compressor, you are ready to tackle jobs more efficiently – from framing a house with a nail gun to inflating heavy equipment tires with a DC motor unit on the go.
Need help choosing the right air compressor? Contact our team for personalized advice. We offer a full range of electric motor and DC motor air compressors to match any application. Subscribe to our newsletter for more how-to guides and product updates.